Setting Up a Minimal-Permission API Key on Bitfinex: A Required Step Before Handing Over Auto-Lending to Kindo
Learn how to create a Bitfinex API key with lending and read-only permissions and provide it to Kindo, so Kindo can lend on your behalf while keeping your funds safe from withdrawal.

This guide explains how to create an API key on Bitfinex that only has lending and read-only permissions, then submit it to Kindo. Once set up, Kindo can execute lending on your behalf while ensuring your funds remain safe and cannot be withdrawn.
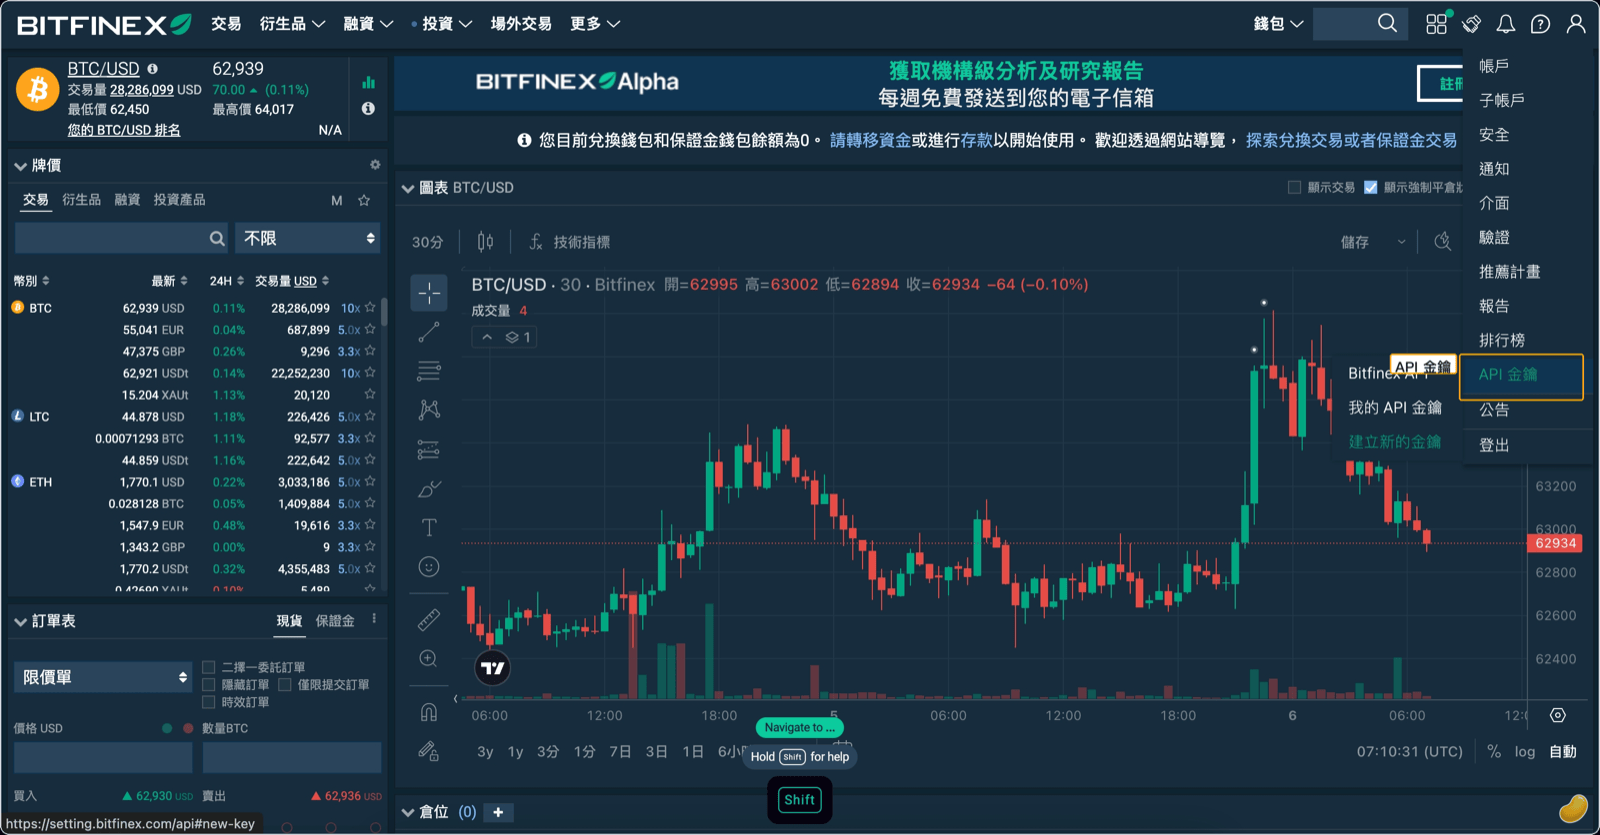
Go to the API Keys Page
After logging into Bitfinex, click the account menu in the top-right corner and select "API Keys" (in some interfaces, the path is "Security → API") to access the key management page. Click "Create New Key" to begin.
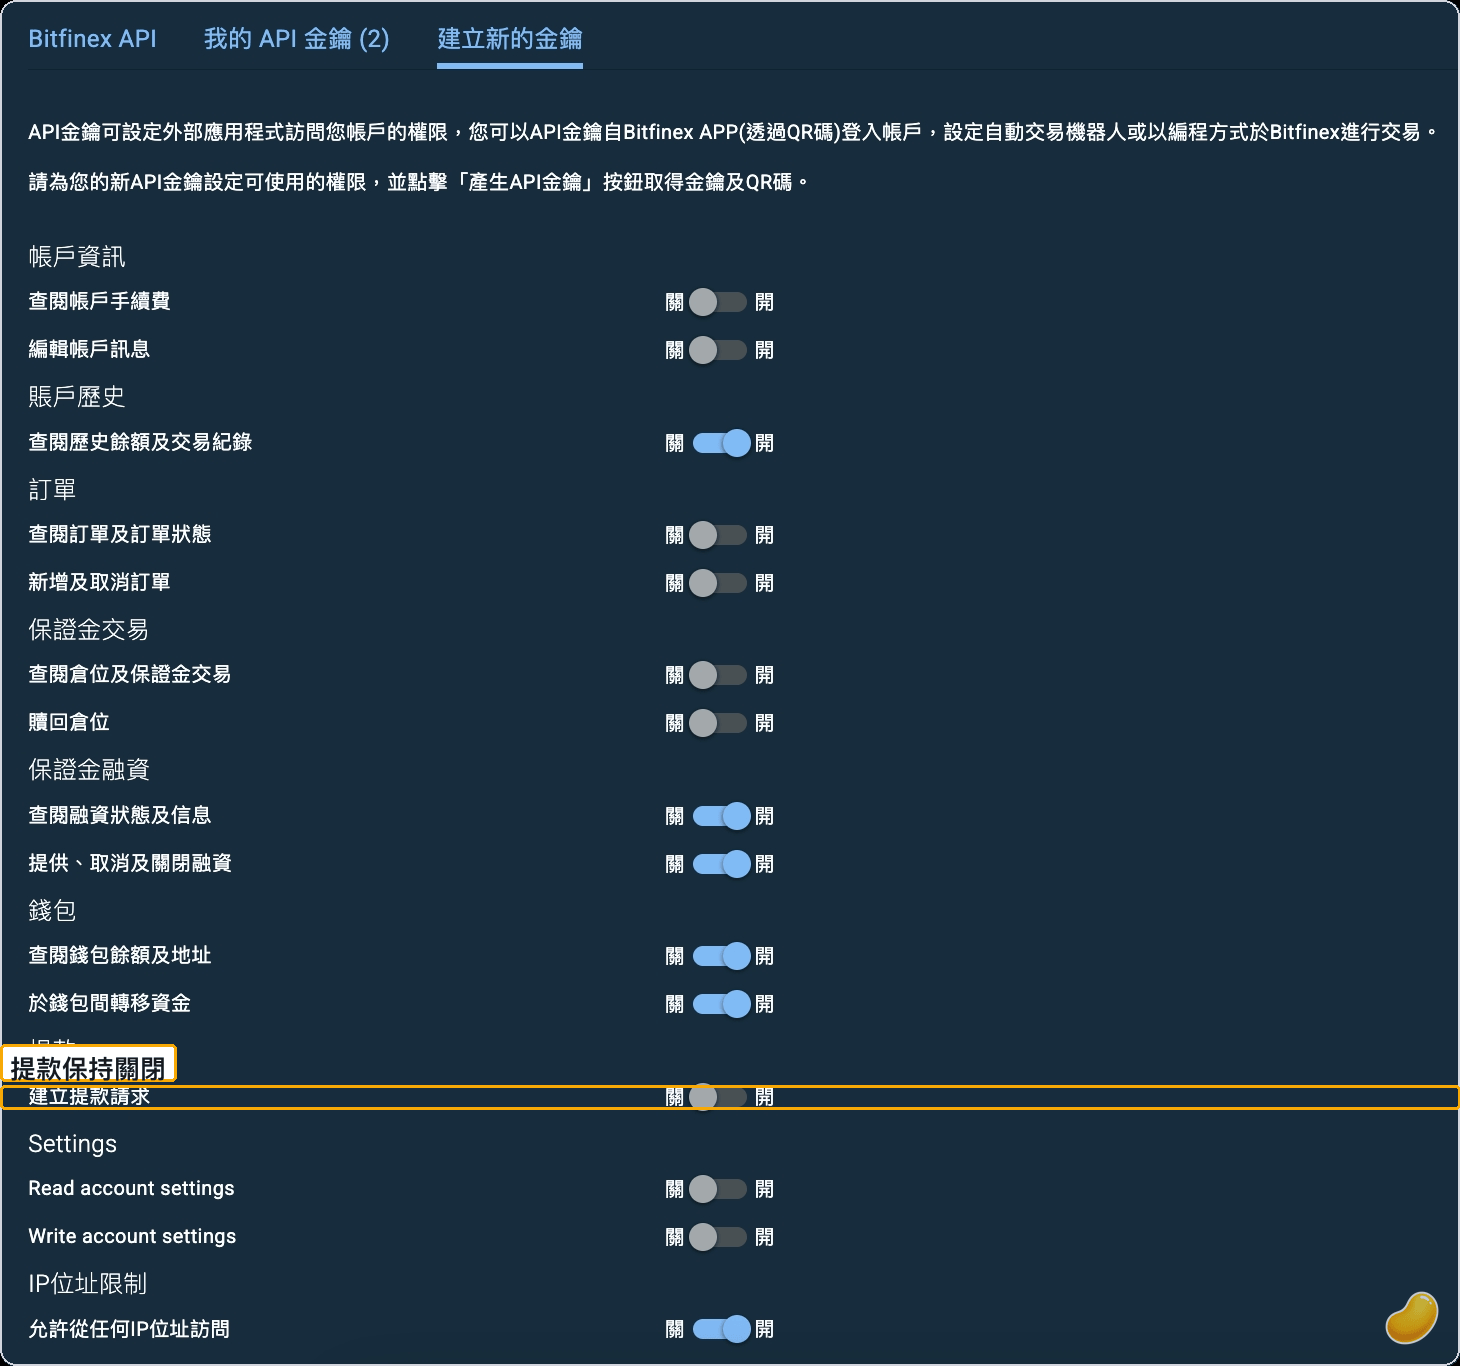
Configure Key Permissions
This step is the core of the entire process. Enable only the items listed below — turn everything else off.
| Permission Category | Specific Item | Status |
|---|---|---|
| Account History | View historical balances and trade history | On |
| Margin Funding | View funding status and information | On |
| Margin Funding | Offer, cancel, and close funding | On |
| Wallets | View wallet balances and addresses | On |
| Wallets | Transfer funds between wallets | On |
| Withdrawal | Create withdrawal request | Off (never enable) |
| Orders | All sub-items | Off |
| Margin Trading | All sub-items | Off |
| Account Settings | Read/write account settings | Off |
| IP Address Restriction | Allow access from any IP address | On |
Withdrawal permission must remain off. This is the most important security measure: even if the API key is accidentally leaked, no one can initiate a withdrawal through Kindo or any external service. Kindo does not need withdrawal permission to perform lending operations.
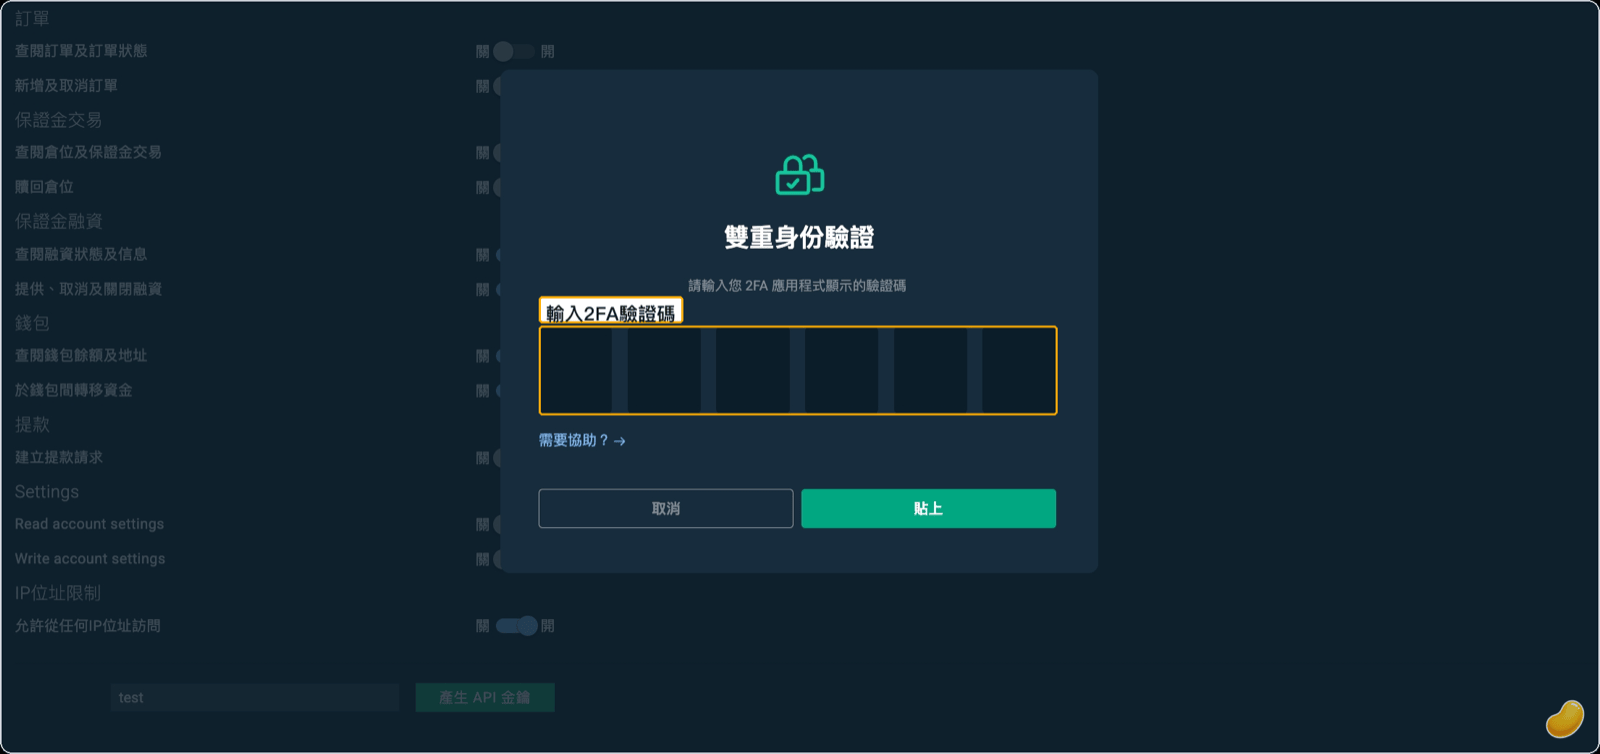
Confirm Key Generation with 2FA
Once you've confirmed the permission settings are correct, click "Generate Key." Bitfinex will require two-factor authentication (2FA) to confirm this action — enter the six-digit code from your authenticator app and submit.
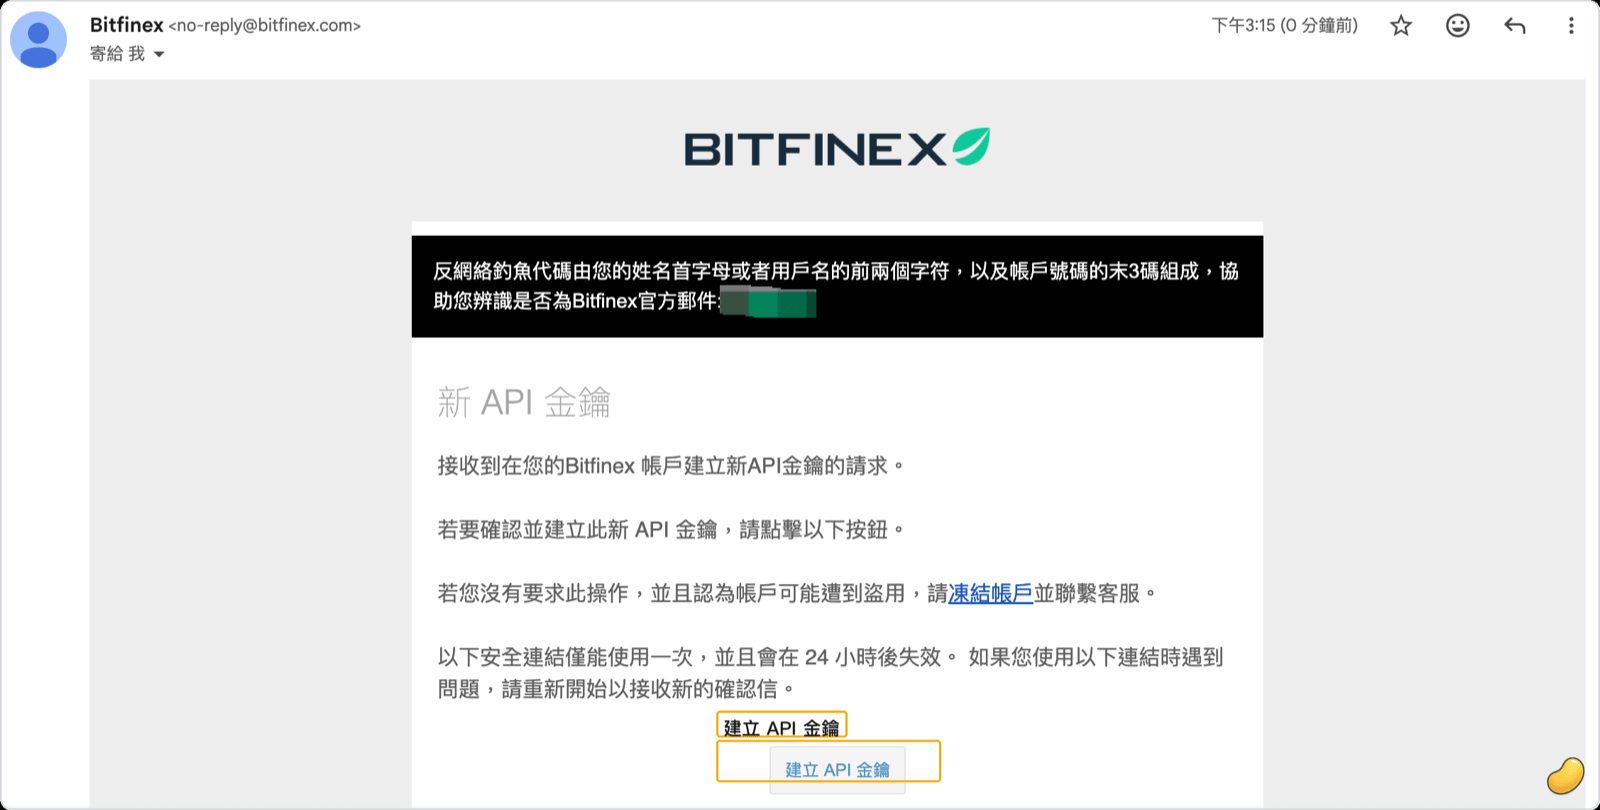
Confirm Key Creation via Email
After submitting, Bitfinex will send a confirmation email to your login address. Open the email and click the confirmation link — the key will only be officially created and activated once confirmed.
Save Your Key and Secret
After email confirmation, the Bitfinex page will display your API Key and API Secret.
The API Secret is shown only once on this screen and cannot be viewed again after you leave the page. Copy it immediately and store it somewhere secure (such as a password manager). If you fail to save it in time, you'll need to delete this key and create a new one.
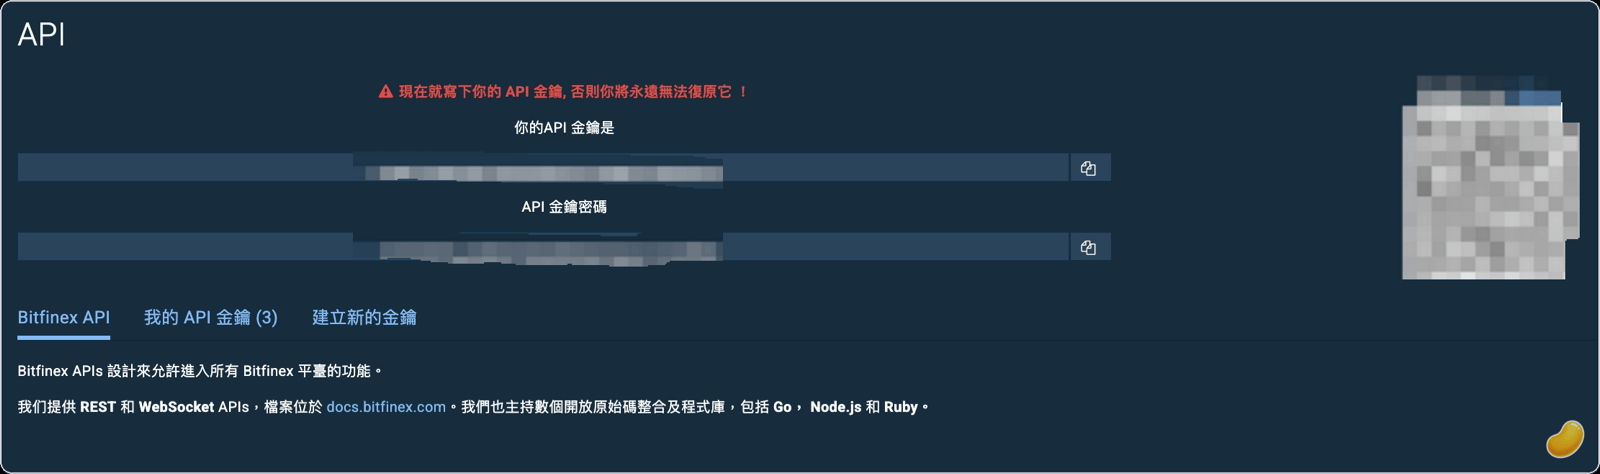
The next step is to enter this key into Kindo, complete the connection setup, and start auto-lending.
FAQ
What if I selected the wrong permissions?
Bitfinex does not support modifying permissions on an already-created key. If you made a mistake, delete the key and create a new one. Kindo verifies key permissions during connection, and any key with withdrawal or trading permissions will be rejected.
What if I didn't save the API Secret in time?
The Secret is not displayed again after leaving the generation page, and it cannot be retrieved afterward. If you missed it, simply delete that key and create a new one.
How should I configure the IP restriction?
This guide sets the option to "Allow access from any IP address." If you have a fixed server IP and want tighter control, you can restrict access to a specific IP — but make sure Kindo's outbound IP is included in the allowlist, or lending instructions won't be able to reach Bitfinex.
Disclaimer: This article is for informational purposes only and does not constitute investment, financial, or tax advice, nor is it a solicitation. Cryptocurrency and lending involve risk, returns fluctuate and are not guaranteed, and principal loss is possible. Lending rates are determined by market supply and demand, and past performance does not indicate future results. Please assess your own risk; consult a professional for tax matters.